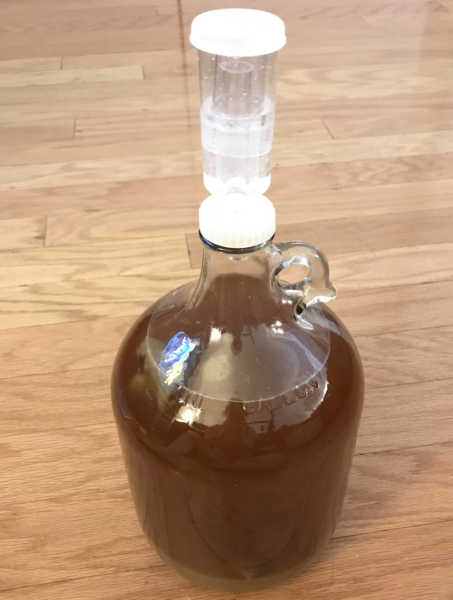
FOMO Cure #1: Home-brewing

I was going through the closet looking for a pair of shoes a couple days ago, and I spotted something in the corner: a beer making kit, which I got as Christmas present for Alan four years ago. I’ve always wondered what the hell he did with the kit, and frankly, I was so happy to find it untouched! A very small part of me was pissed at my fiancé for completely dismissing my gift, but I was so happy because now I got to experiment with it!!! Making wine in a tiny shoebox apartment in New York City is nearly impossible, but homebrewing is so much more manageable. This is how my very first drunk experiment started.
The 4-year old beer kit came with a few flaws that could lead to horrible beer.
- At least 4-year old malt
- The yeast package that has been expired for more than a year and a month
- The digital thermometer that actually read 10 C less than what actual temperature
- An apartment that’s impossible to control the temperature
All of these factors can, and most likely will, impact the fermentation process negatively. The most worrisome is the 4-year old malt. Honestly, I only know the basics of beer making such as how fermentation works, but I don’t really know the composition of malt. Yes, it starts with dried malt, but if I were to think of this in terms of winemaking, it’s like using grape juice that’s been sitting in the fridge for four years. Since this is my very first home-brewing, I thought this would be, at least, a good way for to get hands-on practice and get back to experimentation.
This is what went down on the first day of fermentation:
- Before I started, I sanitized the hell out of the fermentation equipment. Sanitation is the most important part of fermentation. You want to make sure that there are no microorganisms other than yeast. If you don’t sanitize and have some residual microorganisms left on your tools, chances are that some unknown microorganism will also be part of your fermentation, which can lead to lots of funky stuff in a very negative way.

- I made “wort” by cooking the four-year-old dry barley at 63 – 68 °C for 60 minutes and filtering the barley from the liquid. 30 minutes in of cooking the barley, I realized that the digital thermometer was reading 10 C higher than what it really was, so I decided to cook for 10 more minutes. Wort is cooked barley liquid with fermentable sugar. Cooking barley for an hour in water at 63-68 C extracts the fermentable sugar, which later will be converted into alcohol by yeast during the fermentation. This step is called mashing according to the beer making instructions.

- I boiled the wort for another 60 minutes and added hops. Hops is the source of the green and herbal aromas you get from beer. I divided packaged hops into 3 portions, so I could add in hops at three different stages, beginning, during and last part of boiling stage.
- Once the wort has been boiled for 60 minutes, I cooled it until the temperature read 21°C or room temperature (it’s summer in the city, and I can only control the temperature so much). I then moved the wort to the fermenter jug. I was somewhat skeptical of the instruction saying use the strainer to move the liquid to add oxygen into the liquid for yeast to use Oxygen during the fermentation. I wasn’t sure how much of the oxygen would actually get into by using the strainer, but I used it so I can filter some sediments.
- With the wort in the fermenter, it was the time to start the fermentation: by adding the yeast! All I had to do was dump the packet of the dried yeast straight into the jug, and let the fermenter sit in the cool dark place for two weeks.

Worried about yeast not activating due to its age, I checked the fermentor 6 hours of yeast addition. AND I WAS SO HAPPY TO SEE WHAT I SAW!
BUBBLES!!
There were bubbles in the airlock and the wort was had a large layers of bubbles on top. Bubbles mean fermentation is working; carbon dioxide is bi-product of fermentation, so as CO2 escapes the wort, it creates the bubbles. It was such a relief that fermentation is at work. AND it proves that an expiration date is merely a suggestion. Now that I know the fermentation is really working, I can barely wait for two weeks to taste and bottle them! Stay tuned, this saga is to be continued…